Chili Roasted Sweet Potatoes

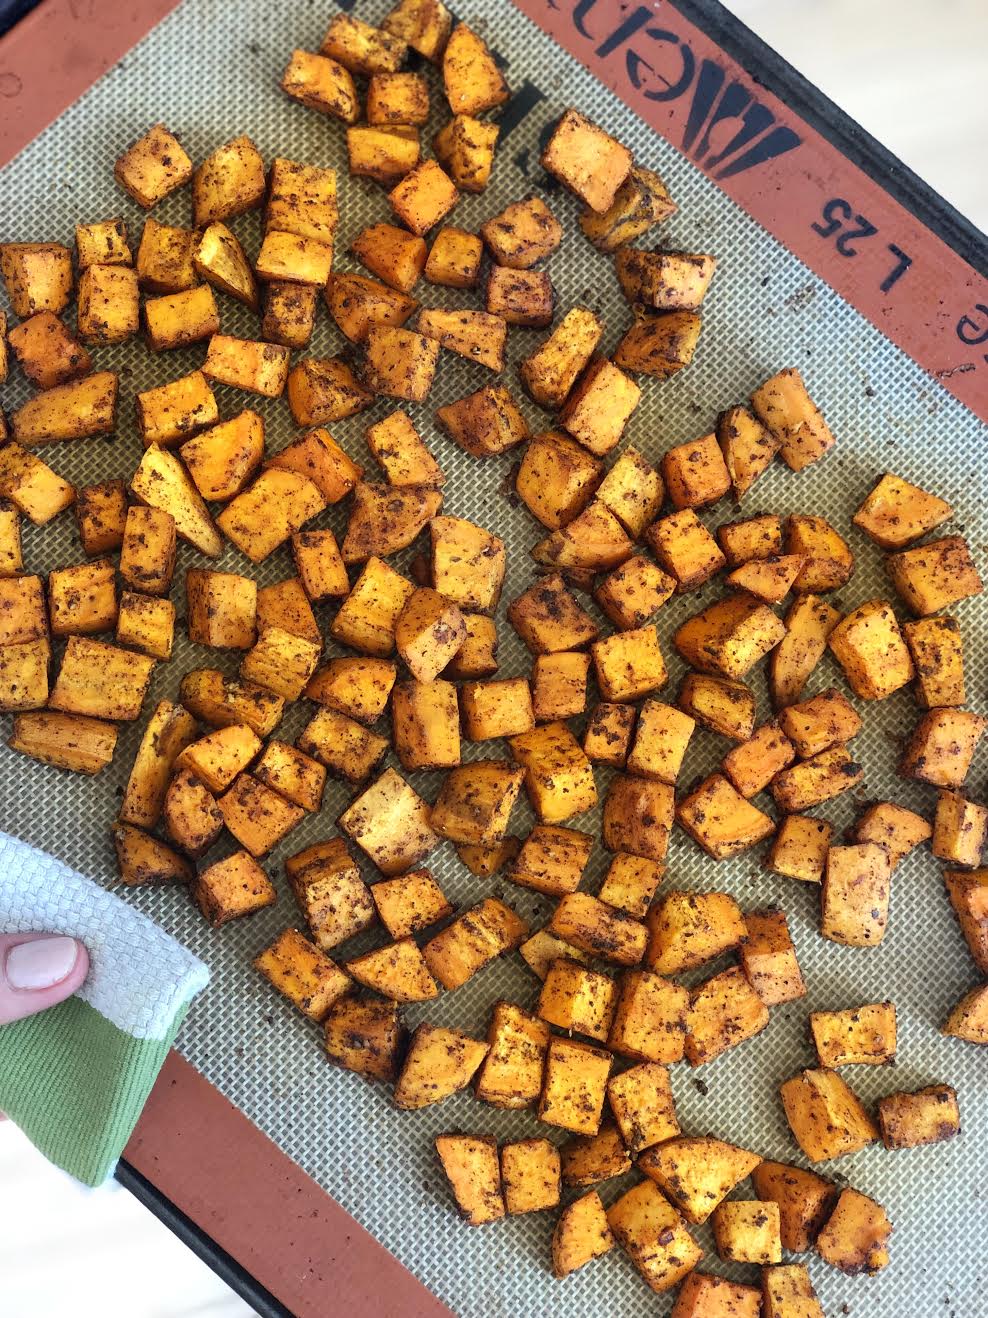
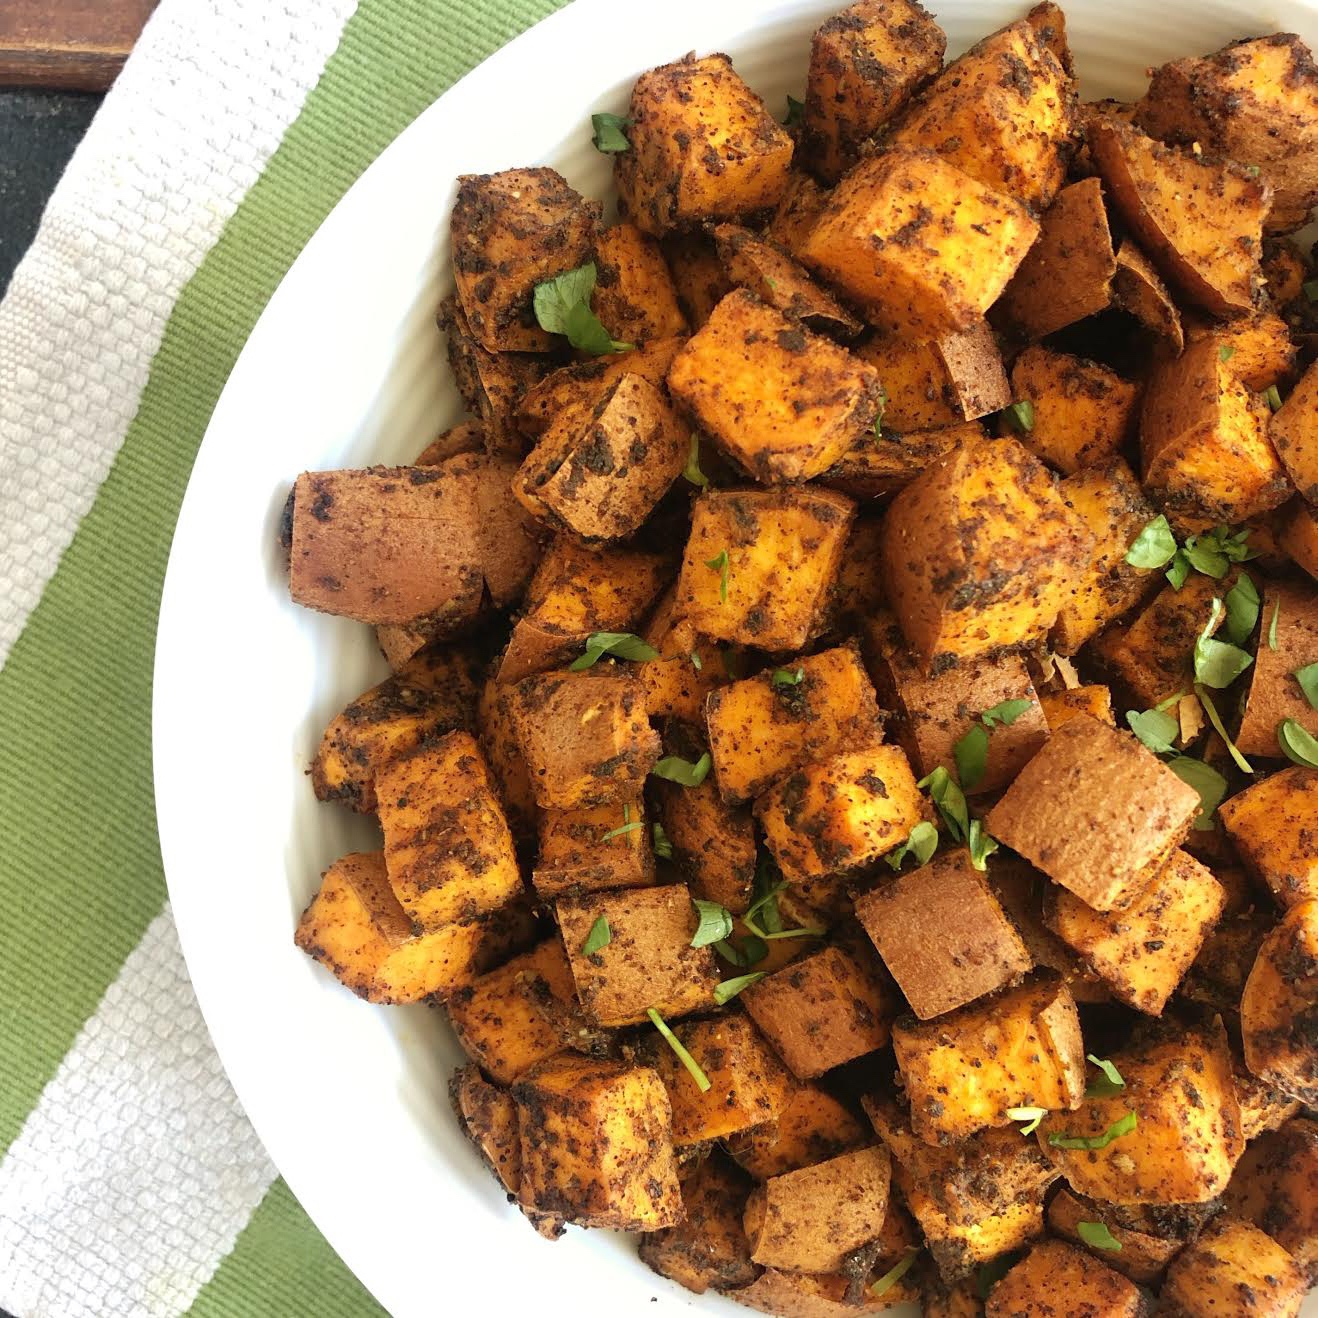
If you’ve ever been to one of my events, cooking lessons, or yoga retreats where you’ve had the opportunity to eat or make one of my Buddha Bowls, you’d be familiar with my chili roasted sweet potatoes. As you’ll see in the photo below, they look like sweet potatoes that are slightly overcooked. I didn’t burn them, I swear, they are simply coated with lots of tasty chili spice which plays nicely into the sweetness of the sweet potatoes.

This is a really simple recipe that can be enjoyed as a part of my Buddha Bowls or used as a side dish for any meal. You don’t necessarily need to cut them into cubes as I suggest below. You could turn them into chili fries by cutting them into long strips or even try spiralized chili roasted curly fries. Just note that cooking times will vary depending on how big or small (or curly) your sweet potatoes are. By the way, I’ve made this recipe using peeled and unpeeled potatoes. I tend to like the texture of roasted sweet potatoes with the skin. That said, if I have organic sweet potatoes I'll leave the skin on, and if I end up with conventionally grown, I’ll peel them.

Scroll down for the full recipes! If you try it out, please let me know how it goes. Tag me on Instagram and I’ll be sure to share your photos.

CHILI ROASTED SWEET POTATOES 

Makes 4 to 6 servings.

Ingredients:

2 pounds of sweet potatoes (~3 small sweet potatoes) 
1 -2 tablespoons chili powder, to taste
2 tablespoons olive oil or melted coconut oil
1 teaspoon garlic powder, optional
1/4 - 1/2 teaspoon salt, to taste
Freshly ground black pepper, to taste

Directions: 

Preheat your oven to 375ºF. Line a baking sheet with parchment paper or a silicon liner.

Thoroughly wash the sweet potatoes, then cut them into dice sized pieces. Place the sweet potatoes in a large bowl and drizzle over the oil and sprinkle on chili powder, garlic powder, salt & black pepper. Toss the potatoes until evenly coated in oil and spices.

Spread the seasoned sweet potatoes evenly over the baking sheet in a single layer. Transfer the baking sheet to the preheated oven and bake for 25 minutes, stirring once half way through. By 25 minutes the sweet potatoes should have softened and slightly browned on the edges. However, total cooking time will ultimately depend on the size of your cubes. If they are not softened to your linking, cook them for 5 - 10 minutes more.

These will keep in the fridge for 5 days.

If you enjoyed the recipe I shared above be sure to check out my Plant-Based Breakthrough program, which is a crash course in plant-based health, nutrition, and meal planning. For details about the program click here. You can also join the Plant-Based Breakthrough Community on Facebook where I share recipes, inspiration, and information on plant-based nutrition.

Sautéed Garlicky Greens

I love leafy greens! If you've been reading my blog, or attending any of my cooking lessons, you probably know this by now. Usually I talk about incorporating greens into soups, smoothies, stews and stir fry, but to be honest, most days I keep it really simple and I'm happy to eat a big ol' bowl of sautéed kale or collards. Is that weird? Maybe. Either way, I've been meaning to share this "recipe" with you for a while. It's very simple and can be used with whatever greens you have on hand. 

Just so you know, the term "greens" generally refers to a broad category of leafy vegetables, including collard greens, mustard greens, swiss chard, beet greens, arugula, kale, spinach, etc.  Although most of these are readily available and packed with nutrients, they tend to be overlooked. Given the excellent nutritional profile of leafy greens, I encourage you to seek them out and try different varieties.  You can use the recipe below as a starting point. 

I  enjoy sautéed greens as a snack topped with hemp hearts, as a side dish, in a Buddha Bowl, or served with Quinoa Pilaf and chickpeas or beans. My personal favourite is to make open faced sandwiches topped with Hummus  and sautéed greens. It does get a bit messy, so a fork and knife are necessary.

Scroll past the photo of sautéed beet greens and you'll find my simple formula for Sautéed Garlicky Greens. Enjoy! 

unnamed.png

SAUTÉED GARLICKY GREENS  

Ingredients:

  • 1 large bunch greens of your choice (kale, spinach, collards, arugula, chard, beet greens, mustard greens, etc.)

  • 1 to 2 tablespoons, extra virgin olive oil or coconut oil

  • 3 to 4 cloves, garlic, minced

  • Fresh lemon juice or vinegar of your choice, to taste

  • Sea salt and freshly ground pepper


Directions: 

To prepare the greens, give them a thorough wash, and then chop or rip the leaves into bite sized pieces.  If you are using kale, collards or chard, cut away the stems first. You can use the stems in your sauté as well, just be sure to slice them into small pieces. For less hearty greens like arugula or spinach, there’s no need to separate the stems. 

Heat the oil in a large skillet or stir-fry pan on medium. Add garlic and sauté for a few minutes, until slightly golden. (If you’re using the stems, add them to the pan at the same time as the garlic.)

Add the greens and continue to cook over medium heat, stirring frequently. Add a splash of water or vegetable broth, if needed, to keep the pan moist. 

For hearty greens, like kale or collards, cook them until they are tender, but still green in colour — this can take about 5 to 7 minutes.  For softer, more delicate greens, like spinach or arugula, cook until they are wilted — this may only take a minute or two. 

Finally, add a big squeeze of lemon juice or a few splashes of vinegar to your greens. I personally love apple cider vinegar, but use whatever you like!  Season with salt and pepper and then serve immediately. 

Perfect Quinoa Pilaf

Did you know that quinoa is not technically a grain? It's a seed (or sometimes referred to as a pseudocereal) and is grouped into the same family as spinach, swiss chard and beets.  High in antioxidants and anti-inflammatory, quinoa may be protective against cardiovascular diseases and also help lower cholesterol.  Quinoa is a complete protein source and is rich in fiber. It's also a very versatile food that can be incorporated into a wide range of recipes, and can be eaten whole or ground into flour. It's become very popular in the last few years, and for good reason!

As I mentioned, there are many ways that you can incorporate quinoa into your diet. However, in this post, I'm going to share a very simple recipe that has become very popular among my clients.  This Quinoa Pilaf recipe has been a longtime favourite as it makes the perfect side-dish for stews, soups or stir-fry and can be used as the base for salads. Lately it's been on high rotation as part of my Buddha Bowls.

I'll admit that even as a trained chef, I've had my fair share of trouble with quinoa. When cooking it, I used to cross my fingers that it wouldn't end up too soggy and that it would fluff up nicely.  In this recipe, you'll lightly cook onion and garlic in oil to create a nice base of flavour, and then you'll quickly "toast" the quinoa before adding any liquid.  The process of toasting, combined with the right balance of liquid to quinoa ratio, will result in a light and airy dish with a hint of nuttiness. 

Also, you'll notice I mentioned "rinsing" the quinoa. Many chefs will suggest doing this as the outer shell of the quinoa is coated in sapponins. These bitter-tasting sapponins area actually healthful phytonutrients but they can result in a less palatable final product if they are not rinsed off. I recommend rinsing your quinoa off in a fine mesh strainer under cold water for a few minutes.  That said, the processing and cooking of quinoa often removes a great deal of the sapponins so this isn't mandatory, just a personal preference. 

Now, without further ado, please scroll down to find the full recipe!

QUINOA PILAF

Makes approximately 3 cups

Ingredients:

1 cup quinoa, rinsed and drained
2 tablespoons olive oil or coconut oil
1 small onion, minced
2 cloves garlic, minced
1.5 cups, water or low sodium organic vegetable broth
Sea salt

Directions:

Pour the olive oil into a small saucepan and warm over medium-high heat. Add the onion, garlic and a generous pinch of sea salt, and sauté for a few minutes until the vegetables become translucent.

Add the quinoa and continue cooking for a few more minutes (5 minutes or so), stirring constantly to toast quinoa a bit. You should be able to smell the nutty aroma of the quinoa at this point.

Pour in the water or vegetable broth and bring to a boil. Reduce the heat to low and allow the quinoa to simmer. Cook covered until the liquid has absorbed and the quinoa has unfurled, about 15 minutes.

Remove from heat and let stand for 5 minutes. Fluff the quinoa with a fork and serve immediately.

Store in the fridge in an airtight container for up to 1 week.